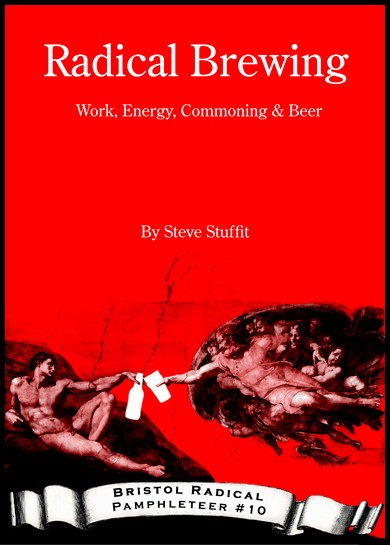
Radical Brewing – Work, Energy, Commoning & Beer
£2.00
This is a journey from pre-enclosure herbal brews made by ale-wives to the domination of hops and large breweries. But don’t despair, this is a return trip thanks to the rediscovery of commoning and a recipe for nettle and juniper ale. By Steve Stuffit!
Out of stock
Description
This is a journey from pre-enclosure herbal brews made by ale-wives to the domination of hops and large breweries. But don’t despair, this is a return trip thanks to the rediscovery of commoning and a recipe for nettle and juniper ale. By Steve Stuffit!
|
You can make a beer at home the way you like your beers. Do you like a hoppy beer like “Sierra Nevada” try our award winning Show Low Pale Ale Do you like malty Scottish Ale’s like “Belhaven Scottish Ale” try our: Award winning Sidewinder Scottish Ale. Do you like Sam Adams? Try our John Q Adams Patriot Ale Do you like Mexican beer like Corona? Try our Le Corona You can make them hoppy or malty (sweet), alcoholic or light, in other words you make the beers the way you want them – at a fraction of the cost. We get so many customers that say they will never go back to commercial beers since the ones made at home are so much better. The BYOB staff will make the homebrewing experience as pleasurable as possible, by lending you a hand through any process you like Beginner: is as easy as boiling a galloon of water and adding malt extract kit to it Intermediate: we do recommend the ingredient kits that combine the processes of using malt extract and steeping your own grains for that individual flavor. Advanced: called “mashing” of grains where you convert the starches in malted barley to sugar. The ingredient kits we sell have all it takes to make it easy for that home brewed beer. Or, if you want to send us your recipe through the special order form we will tell you what that recipe will cost you and we will also figure your gravity’s and potential alcohol and IBU ’s.
|
|
|
Definition of Acronyms. Commonly used Acronyms in brewing: |
|
|
The recommended items you need to brew an extract batch at home:
Stove or burner outside burner will make the process go a lot faster since most burners are a lot hotter than normal cooking stoves and if you have a boil over not so much mess to clean up Pot for boiling minimum size you can get by with is 4 gallons, but 5-gallon pots will give you more room to boil more of your wort. Stainless steel is the preferred pot, as aluminum has been known to give metallic flavors to some beers. Cooking spoon Primary Fermenter, 6.5 gallons either a glass carboy or a food grade plastic bucket with a tight fitting top. Airlock that fits in the top with a stopper Racking (transfer) equipment should compose of racking cane and tubing, using just tubing will cause you to pick up a lot of sediment Secondary Fermenter, if you are going to use one using a secondary will give you a lot smoother and clearer beer. We recommend 5-gallon glass carboy. You can see the sediment settling out. Bottling bucket w/ spigot, an open 5 gallon bucket with spigot to be used only for bottling where you can mix the priming sugar with having sediment mixing in as well. Bottle filler, fits on the spigot of the bottling bucket with a plunger tip that sets on the bottom of the bottle to fill your bottles from the bottom up. Less possibility of oxidation. Bottle Capper, Used to tighten caps on to bottles. Sanitizing agent, we do not recommend bleach as the water you use to rinse out the bleach could cause you problems. This is the number one thing in getting good beer. Clean, Clean, Clean!!! Any item that comes in contact with your beer must be sanitized. Brushes, Used to clean bottle and carboys Hydrometer, used to check specific gravity. Guessing when a batch is finished or counting days can cause bottle to explored if your beer has not finished fermenting, Thermometer, used to check temperature of steeping grains and the temperature of wort to pitch the yeast. Bottles, 53-12 ounce clean or 24-22 ounce returnable bottles. Do not use twist off type bottles. This is just a must list; there are a lot of items that can and will make your brewing a lot easier. An all grain batch takes specialty items such as a mash and lauter tuns, if you have any question about them send us a request and we will mail that info back. But you still need these items along with the all grain equipment. |
|
|
The following is a basic procedure page for making beer. All of our ingredient kits will come with an instruction sheet that will vary according to style of beer: 1. Thoroughly clean and sanitize all brewing equipment. 2. Add 2 gallons of water to your pot. Take the bag of grains and empty into the steeping bag. Tie bag and place into pot. Bring temperature of water and grains to 155 degrees and steep for 30 minutes. 3. Remove the grain bag from the steeping water and squeeze excess water and discard bag and Grains. 4. Bring this to a boil. 5. Remove from heat and add all Malt Extract. 6. Bring this mixture to a boil and add Bittering hops directly into the pot. 7. Allow the wort to boil for 45 minutes. Add the flavoring hops to hop bag , add to boil. 8. Boil for an additional 15-min. 9. (Relax, have a homebrew) 10. Put 3 ½ gallons of cold water in your 6.5-gallon primary fermenter and add the wort. 11. Put on the lid and airlock. Fill airlock half way with water. 12. Allow the wort to cool to 75 degrees or below. The stick-on thermometer can monitor temperature. 13. When the temperature reaches 75 degrees it is time to pitch your yeast. Before the yeast is pitched take your original Gravity reading. Never drop the hydrometer directly into the wort, but pull some wort out and test in a tube or large glass. 14. Follow the directions on the package of yeast before pitching. 15. Put the lid and airlock back on fermenter. 16. Keep the fermenter in an area which will maintain a constant temperature of below 75 degrees, but no lower than 60 degrees. Fermentation should start in 8 to 48 hours. 17. Between 3 and 5 days the fermentation will slow or appear to stop. This is a good time to use your hydrometer to test your specific gravity. 18. After 5 days transfer to your secondary if you are using one. Add the Aroma hops now. This is called Dry Hopping. 19. Condition your beer for 7 to 10 days or until it clears, 20. It is now time to bottle your beer. Wash all bottles in hot soapy water and rinse. Use the sanitizer of your choose to sanitize your bottles. 21. Dissolve 5 oz of priming sugar in 1 cup of water and bring to a boil. Allow to cool to room temperature. Place this in your sanitize bottling bucket. 22. Using the siphon equipment transfer your beer to the bottling bucket. 23. Attach your tubing to the spigot on your bottling bucket and fill your sanitized bottles. Leave at least 1” of air space in each bottle. 24. Using your capper cap all bottles immediately. 25. Store your beer at 70 to 75 degrees to carbonate and age in the bottle for at least 10 days. Aging time varies from type and style of beer. Chill and enjoy! |
|


